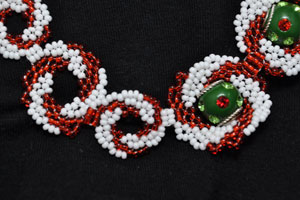
DIY - Peppermint Gems Necklace
A perfect accompaniment to the Peppermint Gem Earrings, this necklace is sure to wow. As with the earrings, each peyote stitched swirl is easy to make. The part that takes the time is the careful construction of each component in this necklace.
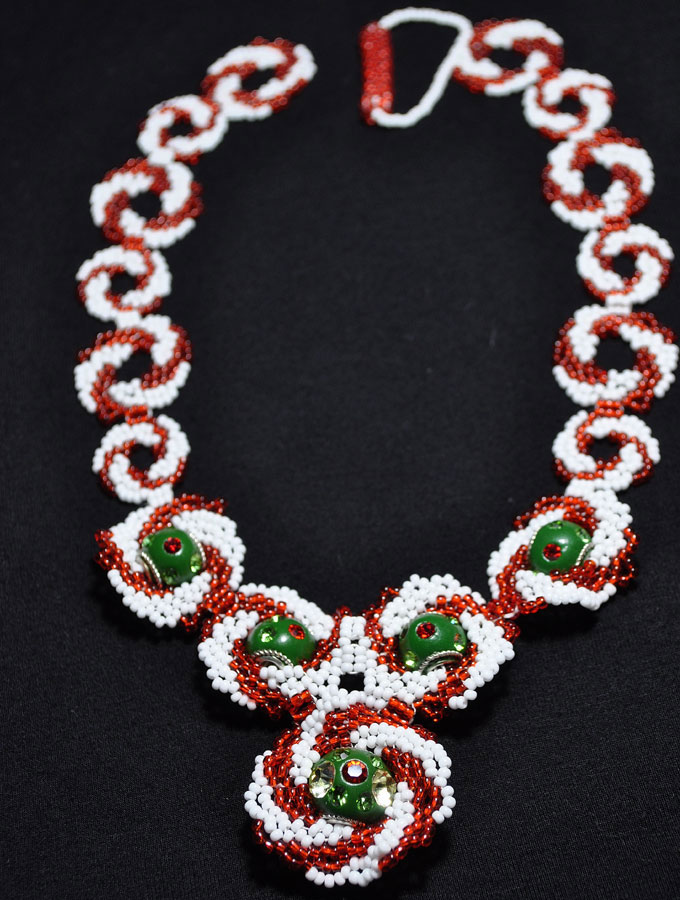
MATERIALS:
- White Beading Thread
- 11/0 Opaque White Seed Beads (A)
- 11/0 Transparent Red Seed Beads (B)
- 4 Green Kashmiri Beads (C)
- 1 Green Kashmiri Bead (D)
TOOLS:
- #12 Beading Needle
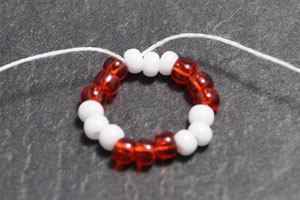
Step 1a (Circle A)
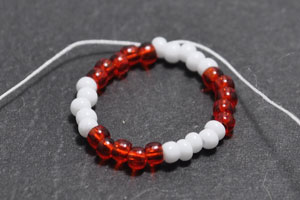
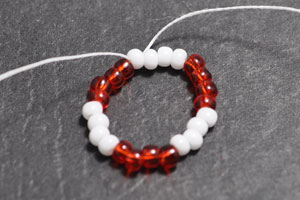
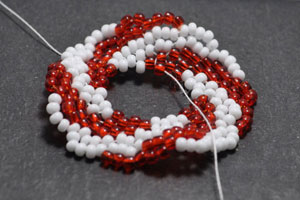
Round 1 - Using 3.5 feet of thread string 5A, 5B, 5A, 5B, 5A, and 5B for a total of 30 beads. Tie into a circle (tight) leaving a 4 inch tail. Go through the first 1A strung to start the second round.
Step 1b (Circle A)
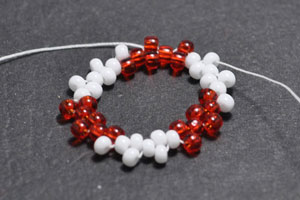
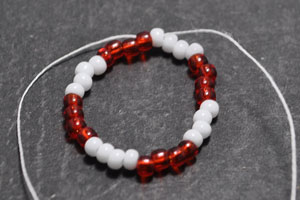
Round 2 - String 1A, skip over 1A from the first round, then pass through the next A from the first round. (This is the start of the circular peyote.) The rest will go as follows skipping beads in the same fashion all the way around the circle: 1A, 1A, 1B, 1B, 1A, 1A, 1A, 1B, 1B, 1A, 1A, 1A, 1B, and 1B. Step up through the first bead added in this round.
Tip: The bead you are adding should be the same color as the bead you just exited.
Step 1c (Circle A)
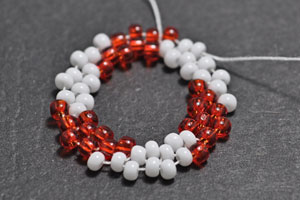
Round 3 - Add a bead in between each one that was just added in Round 2 in this sequence: 1A, 1A, 1A, 1B, 1B, 1A, 1A, 1A, 1B, 1B, 1A, 1A, 1A, 1B, and 1B. Step up through the first bead added in this round.
Tip: Relative tension will keep the piece flat.
Step 1d (Circle A)
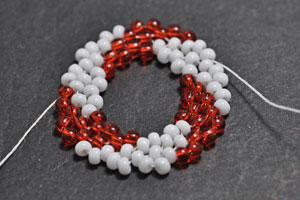
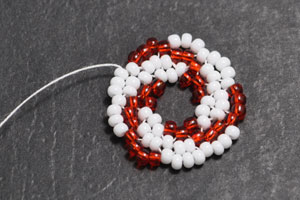
Round 4 - Add two beads in between each one that was just added in Round 3 in this sequence: 2A, 2A, 2A, 2B, 2B, 2A, 2A, 2A, 2B, 2B, 2A, 2A, 2A, 2B, and 2B. Step up through the first two beads added in this round.
Tip: If the piece starts to buckle; one bead can be added here and there, instead of the two, to keep the piece flat. Also, if you are working with beads that are not uniform, you can substitute thin/wide beads that will fill the gap better.
Step 1e (Circle A)
Round 5 - Add one bead in between each set of two beads that were just added in the previous round. Round 5 should have this sequence: 1A, 1A, 1A, 1B, 1B, 1A, 1A, 1A, 1B, 1B, 1A, 1A, 1A, 1B, and 1B. Step up through the first bead added in this round.
Tip: Remember if you made any changes to the previous round (you would be going through just the one bead instead of the set of two).
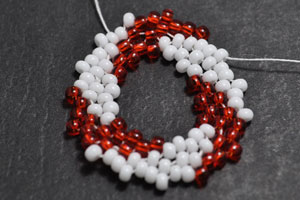
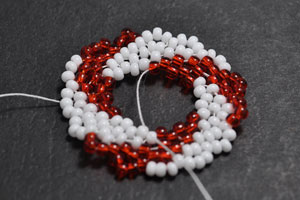
Step 1f (Circle A)
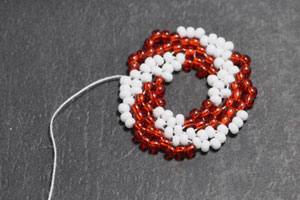
Round 6 - Add three beads in between each bead that was added in the previous round. Round 6 should have this sequence: 3A, 3A, 3A, 3B, 3B, 3A, 3A, 3A, 3B, 3B, 3A, 3A, 3A, 3B, and 3B. Step up through the first three beads added in this round, then exit out toward the center of the circle. Weave in your tail and trim.
Tip: If the piece does not lay flat, you can add two beads here and there, instead of three. Also, you can substitute different sizes as before.
Step 2 (no picture): Repeat Step 1 (a-f) three more times for a total of four "Circle A".
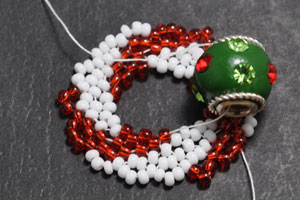
Step 3
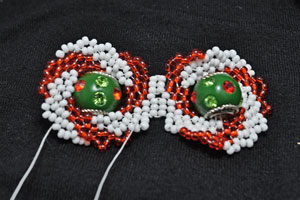
String one C bead on one “Circle A”. Go through the bead directly opposite of the one you are coming from (on the other side of the circle). Go back up through the bead C, and through the seed bead that you first started at. Do this a few times to reinforce the connection.
Step 4 (no picture): Repeat Step 3 on the other three “Circle A”.
Step 5a (Circle B)
Round 1 - Using 2 feet of thread string 3A, 3B, 3A, 3B, 3A, and 3B for a total of 18 beads. Tie into a circle (tight) leaving a 4 inch tail. Go through the first 1A strung.
Step 5b (Circle B)
Work circular peyote in this sequence:
Round 2 - 1A, 1A, 1B, 1A, 1A, 1B, 1A, 1A, 1B
Round 3 - 2A, 2A, 2B, 2A, 2A, 2B, 2A, 2A, 2B
Round 4 - 1A, 1A, 1B, 1A, 1A, 1B, 1A, 1A, 1B
Round 5 - 3A, 3A, 3B, 3A, 3A, 3B, 3A, 3A, 3B
Weave in the tail.
Step 6 (no picture): Repeat Step 5 (a-b) five more times for a total of six "Circle B".
Step 7a (Circle C)
Round 1 - Using 2.5 feet of thread string 4A, 4B, 4A, 4B, 4A, and 4B for a total of 24 beads. Tie into a circle (tight) leaving a 4 inch tail. Go through the first 1A strung.
Step 7b (Circle C)
Work circular peyote in this sequence:
Round 2 - 1A, 1A, 1B, 1B, 1A, 1A, 1B, 1B, 1A, 1A, 1B,1B
Round 3 - 1A, 1A, 1B, 1B, 1A, 1A, 1B, 1B, 1A, 1A, 1B, 1B
Round 4 - 2A, 2A, 2B, 2B, 2A, 2A, 2B, 2B, 2A, 2A, 2B, 2B
Round 5 - 1A, 1A, 1B, 1B, 1A, 1A, 1B, 1B, 1A, 1A, 1B,1B
Round 6 - 3A, 3A, 3B, 3B, 3A, 3A, 3B, 3B, 3A, 3A, 3B, 3B
Weave in the tail.
Step 8 (no picture): Repeat Step 7 (a-b) five more times for a total of six "Circle C".
Step 9a (Circle D)
Round 1 - Using 4.5 feet of thread string 4A, 4B, 4A, 4B, 4A, 4B, 4A and 4B for a total of 32 beads. Tie into a circle (tight) leaving a 4 inch tail. Go through the first 1A strung.
Step 9b (Circle D)
Work circular peyote in this sequence:
Round 2 - 1A, 1A, 1B, 1B, 1A, 1A, 1B, 1B, 1A, 1A, 1B,1B, 1A, 1A, 1B, 1B
Round 3 - 1A, 1A, 1B, 1B, 1A, 1A, 1B, 1B, 1A, 1A, 1B, 1B, 1A, 1A, 1B, 1B
Round 4 - 2A, 2A, 2B, 2B, 2A, 2A, 2B, 2B, 2A, 2A, 2B, 2B, 2A, 2A, 2B, 2B
Round 5 - 1A, 1A, 1B, 1B, 1A, 1A, 1B, 1B, 1A, 1A, 1B,1B, 1A, 1A, 1B, 1B
Round 6 - 3A, 3A, 3B, 3B, 3A, 3A, 3B, 3B, 3A, 3A, 3B, 3B, 3A, 3A, 3B, 3B
Round 7 - 1A, 1A, 1B, 1B, 1A, 1A, 1B, 1B, 1A, 1A, 1B,1B, 1A, 1A, 1B, 1B
Round 8 - 4A, 4A, 4B, 4B, 4A, 4A, 4B, 4B, 4A, 4A, 4B,4B, 4A, 4A, 4B, 4B
Step up through the first 4A strung and weave out toward the middle of the circle. Tie in the tail.
Step 9c (Circle D) (no picture): Attach bead D to “Circle D” in the same fashion as Step 3.
Step 10a (Toggle Clasp):
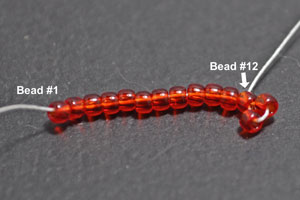
Row 1: String 14B and go back through the 3rd to last bead strung (which would be the 12th bead strung).
Step 10b (Toggle Clasp)
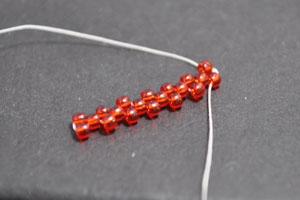
String 1B, skip the B adjacent to it in the previous row, and go through the next B. (Peyote stitch.) When you get to the end tie your working end to the tail, and go back through the last 1B strung to start the second row.
Step 10c (Toggle Clasp)
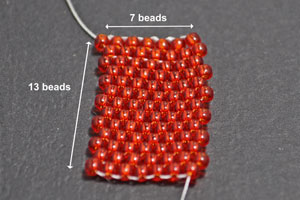
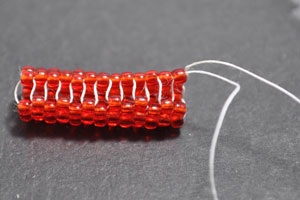
Keep working flat peyote stitch until you have a rectangle that is 13 beads high and 7 beads long. (Make sure there are seven beads in each row).
Step 10d (Toggle Clasp)
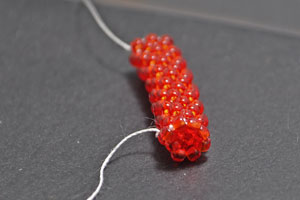
Zip up to form a tube by going through a bead on each side. (Will look like a zipper). Pull tight and knot, making sure to loop around both end beads to secure.
Step 10e: (Toggle Clasp)
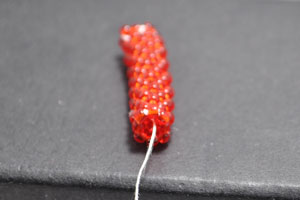
Using the tail as your working thread, string 1B and slide the thread under a stitch at the top of the tube. Pull tight so the bead rests flat. Continue all the way around the tube for a total of 8B’s. Go through all of the B beads to make a clean looking circle on top of the tube.
Weave in the tail, and trim the excess thread.
Step 10f (Toggle Clasp)
Repeat Step 10e on the opposite side of the tube.
After the circle is complete, weave two beads in from the circle you just made. Exit out of the center of the tube (from where you just made the circle).
Step 10g (Toggle Clasp)
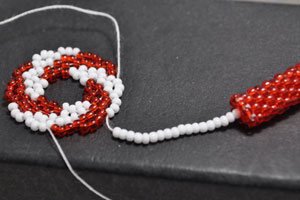
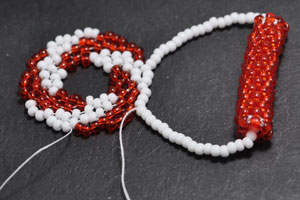
String 20A and pass through 7A on one of the "Circle C".
Tip: It is very important to pay attention to the orientation of the swirls on each circle.
Step 10h: (Toggle Clasp)
String 36A and pass through the tube and beads already strung to form a complete loop. Run the thread through the loop a few times to reinforce the connection.
Once finished, weave in the excess and tie off the thread.
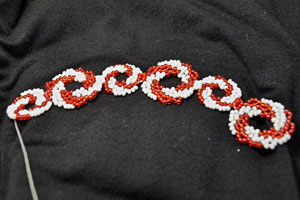
Step 11a (Strap)
With the toggle clasp end:
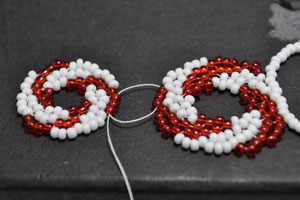
Weave the tail of “Circle C” out to the opposite end as the toggle clasp. Exit through the last set of 3 beads on the swirl which should be red.
Connect these three red beads to the last three red beads in the swirl on one "Circle B".
Notice the direction of the swirls- they are forming an "S" (on it’s side) pattern. The tails left over from the circles are what you will be using to connect each circle in the strap.
Step 11b (Strap)
Connect a “Circle D” to the "Circle B" in the same fashion as Step 11a. These beads should be white.
Step 11c (Strap 1)
Connect a Circle B to the last D (red beads).
Connect a Circle D to the previous B (white beads).
Connect a Circle B to the previous D (red beads).
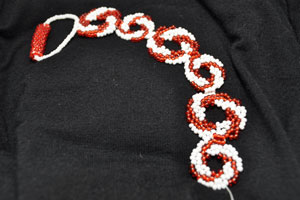
This will complete one side of strap with a total of six circles, ending with the smallest (Circle B).
You want to make sure you are connecting each circle to each other by the last three beads of the swirl. This will create a natural curve to the strap which you want to make sure you also create on the opposite strap.
Step 12: (Strap 2)
Make the opposite strap in the same fashion as Steps 11 (a-c). Connect a Circle D to a Circle B. (Red beads)
Connect a Circle B to the previous D. (White beads)
Connect a Circle D to the previous B. (Red beads)
Connect a Circle B to the previous D. (White beads)
Connect a Circle D to the previous B. (Red beads)
Step 13a (Middle Section)
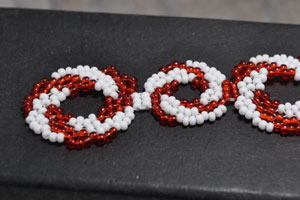
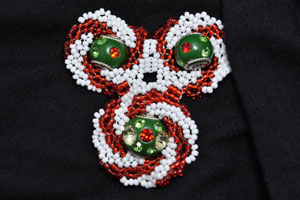
Connect two Circle A together. Align the swirls so they make an upside down "V" pattern instead of the previous "S" pattern. Connect using the first and second, set of three white beads.
Tip: You can keep flipping each circle around, or rotating them until the beads are aligned.
Step 13b (Middle Section)
Connect the Circle D to the two Circle A that you just attached in the previous step.
Align the bead so it is straight, then connect each side. Which ever part of the swirls you are connecting doesn’t matter- just what fits comfortably. Here the red swirls were connected, so the middle white swirl matched with the two Circle A’s above.
Step 13c (Middle Section)
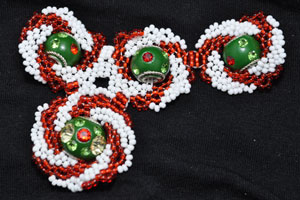
Connect another Circle A to the side of one of the Circle A from the previous Step. These are connected by the second set of three, rather than the last set of three (red beads). Make sure you are continuing the "V" pattern as before.
Step 13d: (Middle Section) (no picture): With the last Circle A, mirror Step 13c on the other side of the middle section (red beads).
Step 14a (Attaching the Straps)
Connect the Circle B end of the strap to one side of the Circle A in the middle section. They should be connected to the last set of three white beads on each piece.
Here you are still doing the "V" pattern.
Pay attention the the natural curve of the strap when you attach it to the piece.
Step 14b (Attaching the Straps) (no picture): Connect the last strap in the same fashion as Step 14a. Make sure that it mirrors the other strap.

